


Technique and material

Unique paint mixtures based on self-distilled essential oils
Both the panels I paint on and the paint mixtures and the wooden frame I make by hand, using traditional methods. Below, I describe the seven steps of this process and you can see how my colour mixtures are created. To create my paintings, I use as many natural materials and paints as possible. I make my paint mixtures myself from modified water into which I dissolve mineral pigments and to which I add self-distilled oils.
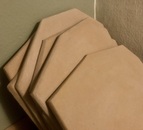
Phase 1: Shaping panel
Compressed wood fibre panel sourced from sustainably managed forests is sawn by hand into the right shape. After the edges are filed, the back is fitted with a wooden reinforcement plate.
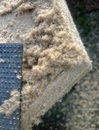
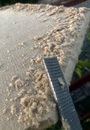
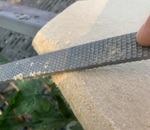
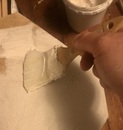
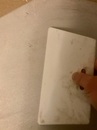
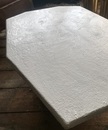
Phase 2: Application of ground
The panel is sprayed with water and pre-treated with fine quartz crystal sand filler. The small quartz crystals provide good brush grip and structure for the next Gesso layer. Then everything is smoothed with a wide putty knife and the panel is put away to dry.
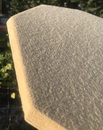
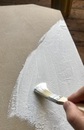
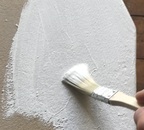
Phase 3: Gesso preparation
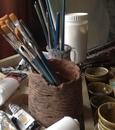
The panel is prepared with white chalk paint (gesso). Usually, three coats are needed so that during the painting process, the white ground will be sufficiently able to reflect "light" from the ground back out. Sometimes I use a brush, but mostly the paint rollers shown in the left image.

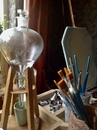
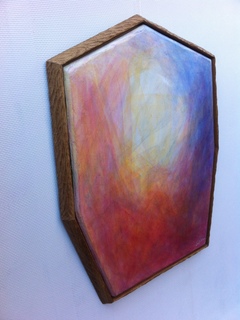
Phase 4: Painting
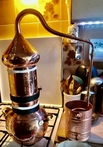
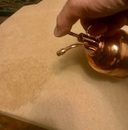
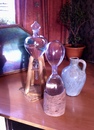
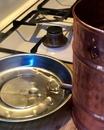
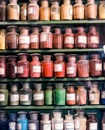
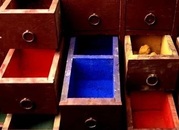
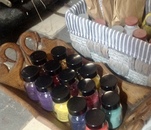
Now comes the phase of actual painting. Again, this process usually takes place in seven stages in which more and more contrast and colour intensity is created. During the painting process, I constantly create new colour mixtures. For this I use vertebrate water (see 4a), essential oil (see 4b) and pure pigments (see 4c) mixed with a binding medium. I mix the pigments with water that I have previously swirled.
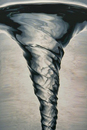
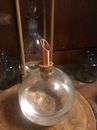
Whirling water means putting water in motion, in a whirlpool, making it vital and full of life force. This same process is also used when making preparations in biodynamic agriculture. I use a glass water swirler for swirling. When the pigments are well dissolved, I add essential plant oils extracted from herbs using a copper distillation boiler. To give a paint mixture a bit more structure, I often add a binder, for instance transparent-drying polymer resin. Painting itself is a matter of patience and necessary preparation....
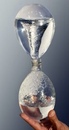
4a Water is swirled...
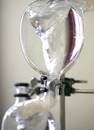
4b Essential oil is made...

4c Paint mixtures are mixed...
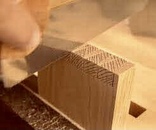
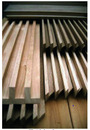
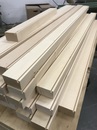
Phase 5: Cutting and gluing the frame
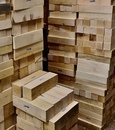
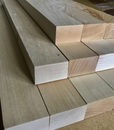
I use different types of wood for the frames: ash, cherry, oak, elm, maple, lime and sweet chestnut wood. After sawing and planing the beams, the right size is measured to make mouldings that fit exactly around the shape of the panel. A groove is milled into the mouldings into which a thin wooden backing is recessed. Then all the mouldings are glued together and carefully put away to dry.
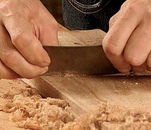
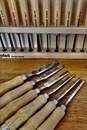
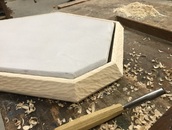
Phase 6: Gouging the frame
When the frame comes out of the glue clamps, it is cut into the right shape, sanded and prepared for gouging.

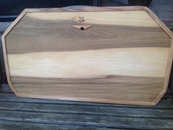
Phase 7: Finishing
The painting is finished with matt beeswax varnish. After the varnish layers dry, a special process follows: the joining of the painting and the frame. The painting is placed in the frame and fastened. The wooden hanging system on the back is attached. The frame is finished with turpentine linseed oil. All the different parts are put together, united, fused with each other at this stage. The work is given a title and a logo stamp is burned into the wood on the back. A new painting is born!
© Waldar 2026